| |
CS089 Series |
Makeover Large Clamp Light |
 |
|
 |
| |
|
Freshwater Series |
Saltwater Series |
| K |
3W 7000K + 1W 7000K + 3W Red |
3W Blue + 1W Blue + 1W 12000K |
| Spectrum |

+

+

|

+

+

|
| Color |
Naturalsun Plant |
Natural Blue |
Size
¡£mm¡¤ |
73¡Ó3x38¡Ó3x345¡Ó3 ¡£WxHxL¡¤ |
Voltage
Frequency |
See the mark label of Adaptor |
Power
Consumption |
15W 0.22A |
LED
Sort |
3W 4PCS + 1W 16PCS |
View
Angle |

|
| Lux |

|
| 2350
¡£¡Ó10¢H tolerance¡¤ |
2100
¡£¡Ó10¢H tolerance¡¤ |
Weight
¡£g¡¤ |
1110
¡£packaged¡¤ |
|
| |
| CS089 |
|
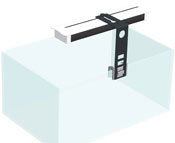 |
|
73¡Ó3x38¡Ó3x345¡Ó3mm
¡£WxTxL¡¤
For 46cm Max |
| |
|
|
- The latest technology :
Close to natural solar spectrum by 3W LED with
4-chips multi-spectrum.
- The safest design :
IPX7 waterproof, lighting accidentally immerse in water at a depth of 1 meter for 30 minutes and then the lighting should pass the voltage withstanding test.
- The most durable :
Play a good cooling effect to prevent luminous decay of high power LED by a good solid heatsink.
- The most practical :
Adjust in all directions to meet various illumination position.
|
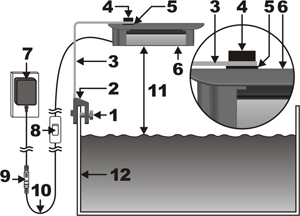
- Screw.
- Plastic bracket.
- Main frame.
- Hand-turn screw.
- Gasket.
- Main body.
- Switching power supply.
- Switching.
- Male & female connectors.
- Drip loop.
- The lighting above the water level at least 40mm.
- The thicknesses of tank allows 4¡ã12mm.
|
|
 |
| |
 |
|
 |
|
 |
|
|
|
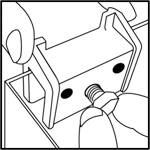
1.Fix the plastic bracket on the tank.
|
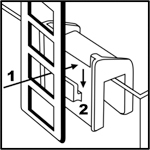
2.Choose the proper height, put the rectangular hole of the metal frame inserting into the plastic bracket.
|
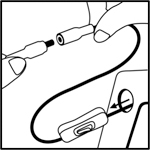
3.Put the switch through the large hole of the metal frame and coupling male and female connectors together.
|
| |
 |
|
 |
|
 |
|
|
|
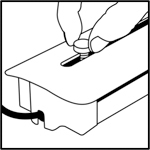
| 4.Loose slightly the hand-turn screw which be above the main body. |
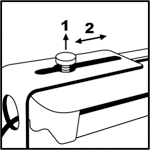
5.Set the hand-turn screw into a small hole of the metal frame from bottom to top, and then adjusting the metal frame to the proper position, and finally locking the hand-turn screw. |
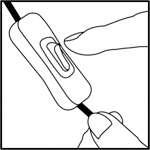
6.The switching power supply be plugged into the outlet, and then use the LED lighting by turning on the switch. |
| |
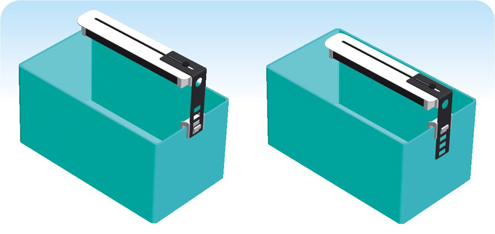
¡´Adjusting up and down. |
 |
| |
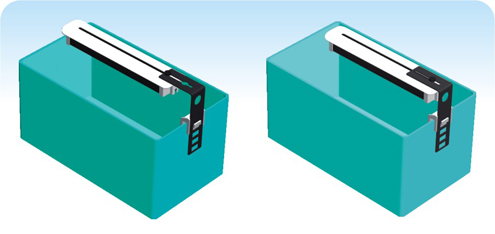
¡´Moving back and forth. |
 |
| |
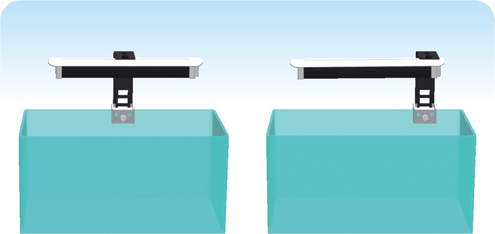
¡´Moving left and right. |
 |
| |
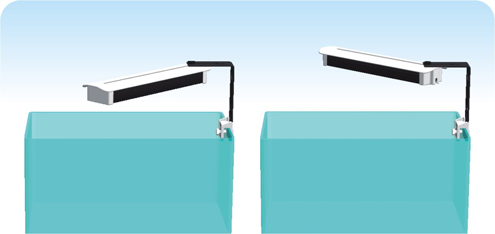
¡´Any angle adjustment. |
 |
- Disconnect supply before opening the lighting for maintenance.
- Plug in the power cord using a drip loop to prevent water from traveling along the cord
and coming into contact with the receptacle.
- Do not stare at LED Bulbs.
|
| Please cut off the power source and unplug the electric wire
for safety, if any situations of danger or urgency happened. |
- Under normal use and service, all appliances carry 12 months warranty from the date of purchase on parts and labor against manufacturing defects. Please return the unit if deemed defective to your local dealer for repair or replacement.
- The warranty is limited to this appliance only, Not responsible for consequential loss or damage.
|
|
| |
|
|
 |
|
|
| |
CS087.88.89 Series |
Makeover Clamp Light |
 |
|
 |
| |
| Freshwater Series |
| K |
7000K |
7000K + 4000K |
4000K |
| Spectrum |
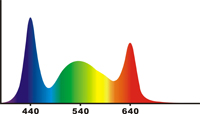 |

+
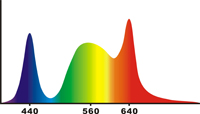 |
 |
| Color |
Daysun Plant |
Naturalsun Plant |
Photosynthesis Plant |
Size
¡£mm¡¤ |
CS087 Series¡G73¡Ó3x38¡Ó3x160¡Ó3 ¡£WxHxL¡¤
CS088 Series¡G73¡Ó3x38¡Ó3x255¡Ó3 ¡£WxHxL¡¤
CS089 Series¡G73¡Ó3x38¡Ó3x345¡Ó3 ¡£WxHxL¡¤ |
Voltage
Frequency |
See the mark label of Adaptor |
| Power |
CS087 Series¡G 6W 0.12A
CS088 Series¡G10W 0.15A
CS089 Series¡G15W 0.22A |
LED
Sort |
CS080-1¡G2pcs
CS081-1¡G4pcs
CS082-1¡G6pcs |
CS080-2¡G2pcs ¡£1W1Y¡¤
CS081-2¡G4pcs ¡£2W2Y¡¤
CS082-2¡G6pcs ¡£4W2Y¡¤ |
CS080-3¡G2pcs
CS081-3¡G4pcs
CS082-3¡G6pcs |
View
Angle |

|
| Lux |

|
CS087-1¡G1120
CS088-1¡G1940
CS089-1¡G2480
¡£¡Ó10¢H tolerance¡¤ |
CS087-2¡G1060
CS088-2¡G1840
CS089-2¡G2390
¡£¡Ó10¢H tolerance¡¤ |
CS087-3¡G1010
CS088-3¡G1740
CS089-3¡G2230
¡£¡Ó10¢H tolerance¡¤ |
Weight
¡£g¡¤ |
CS087 Series¡G 690
CS088 Series¡G 920
CS089 Series¡G1110
¡£packaged¡¤ |
|
| |
|
|
 |
|
|
| |
| Saltwater Series |
| K |
12000K |
12000K + Blue |
Blue |
| Spectrum |
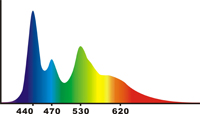 |

+
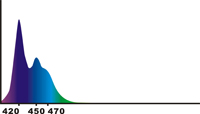 |
 |
| Color |
Day Blue |
Natural Blue |
Ocean Blue |
Size
¡£mm¡¤ |
CS087 Series¡G73¡Ó3x38¡Ó3x160¡Ó3 ¡£WxHxL¡¤
CS088 Series¡G73¡Ó3x38¡Ó3x255¡Ó3 ¡£WxHxL¡¤
CS089 Series¡G73¡Ó3x38¡Ó3x345¡Ó3 ¡£WxHxL¡¤ |
Voltage
Frequency |
See the mark label of Adaptor |
Power
Consumption |
CS087 Series¡G 6W 0.12A
CS088 Series¡G10W 0.15A
CS089 Series¡G15W 0.22A |
LED
Sort |
CS080-1¡G2pcs
CS081-1¡G4pcs
CS082-1¡G6pcs |
CS080-2¡G2pcs ¡£1W1B¡¤
CS081-2¡G4pcs ¡£2W2B¡¤
CS082-2¡G6pcs ¡£4W2B¡¤ |
CS080-3¡G2pcs
CS081-3¡G4pcs
CS082-3¡G6pcs |
View
Angle |

|
| Lux |

|
CS087-4¡G1010
CS088-4¡G1770
CS089-4¡G2340
¡£¡Ó10¢H tolerance¡¤ |
CS087-5¡G 980
CS088-5¡G1720
CS089-5¡G2280
¡£¡Ó10¢H tolerance¡¤ |
CS087-6¡G 960m
CS088-6¡G1680
CS089-6¡G2180
¡£¡Ó10¢H tolerance¡¤ |
Weight
¡£g¡¤ |
CS087 Series¡G 690
CS088 Series¡G 920
CS089 Series¡G1110
¡£packaged¡¤ |
|
| |
|
|
 |
|
|
| |
| Color Plus Series |
| K |
Natural Red |
| Spectrum |
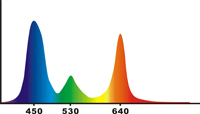
+
|
| Color |
Red Brightness |
Size
¡£mm¡¤ |
CS087 Series¡G73¡Ó3x38¡Ó3x160¡Ó3 ¡£WxHxL¡¤
CS088 Series¡G73¡Ó3x38¡Ó3x255¡Ó3 ¡£WxHxL¡¤
CS089 Series¡G73¡Ó3x38¡Ó3x345¡Ó3 ¡£WxHxL¡¤ |
Voltage
Frequency |
See the mark label of Adaptor |
Power
Consumption |
CS087 Series¡G 6W 0.12A
CS088 Series¡G10W 0.15A
CS089 Series¡G15W 0.22A |
LED
Sort |
CS087-7¡G2pcs
CS087-7¡G4pcs
CS087-7¡G6pcs |
View
Angle |

|
| Lux |

|
CS087-7¡G 850
CS088-7¡G1440
CS089-7¡G1870
¡£¡Ó10¢H tolerance¡¤ |
Weight
¡£g¡¤ |
CS087 Series¡G 690
CS088 Series¡G 920
CS089 Series¡G1110
¡£packaged¡¤ |
|
| |
|
|
 |
|
|
| |
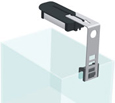
| CS087 |
|
 |
|
73¡Ó3x38¡Ó3x160¡Ó3mm
¡£WxTxL¡¤
For 26cm Max
 |
| |
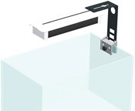
| CS088 |
|
 |
|
73¡Ó3x38¡Ó3x255¡Ó3mm
¡£WxTxL¡¤
For 36cm Max |
| |
| CS089 |
|
 |
|
73¡Ó3x38¡Ó3x345¡Ó3mm
¡£WxTxL¡¤
For 46cm Max |
| |
|
|
- The latest technology :
Close to natural solar spectrum by 3W LED with
multi-chips and multi-spectrum.
- The safest design :
IPX7 waterproof, lighting accidentally immerse in water at a depth of 1 meter for 30 minutes and then the lighting should pass the voltage withstanding test.
- The most durable :
Play a good cooling effect to prevent luminous decay of high power LED by a good solid heatsink.
- The most gorgeous :
The dress of cover color can be changed with their own preferences.
- The most practical :
Adjust in all directions to meet various illumination position.
|
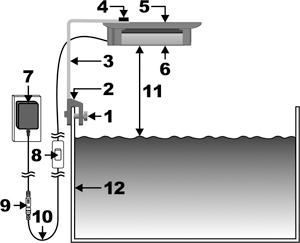
- Screw.
- Plastic bracket.
- Main frame.
- Hand-turn screw.
- Plastic cover.
- Main body.
- Switching power supply.
- Switching.
- Male & female connectors.
- Drip loop.
- The lighting above the water level at least 40mm.
- The thicknesses of tank allows 4¡ã12mm.
|
|
 |
| |
 |
|
 |
|
 |
|
|
|
1.Fix the plastic bracket on the tank.
|
2.Choose the proper height, put the rectangular hole of the metal frame inserting into the plastic bracket.
|
3.Put the switch through the large hole of the metal frame and coupling male and female connectors together.
|
| |
 |
|
 |
|
 |
|
|
|
| 4.Loose slightly the hand-turn screw which be above the main body.
|
5.Set the hand-turn screw into a small hole of the metal frame from bottom to top, and then adjusting the metal frame to the proper position, and finally locking the hand-turn screw.
|
6.The switching power supply be plugged into the outlet, and then use the LED lighting by turning on the switch.
|
| |
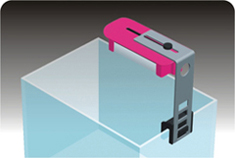
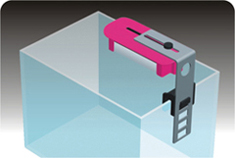
¡´Adjusting up and down. |
 |
|
 |
| |
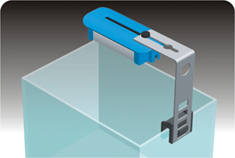
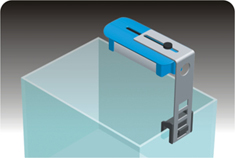
¡´Moving back and forth. |
 |
|
 |
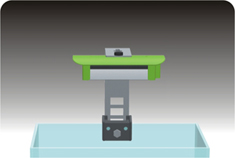
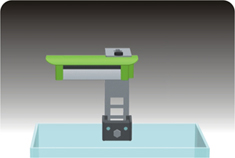
| |
¡´Moving left and right. |
 |
|
 |
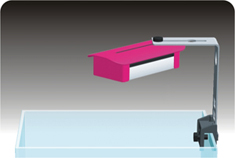
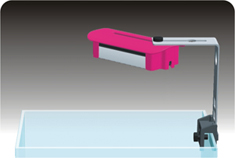
| |
¡´Any angle adjustment. |
 |
|
 |
- Disconnect supply before opening the lighting for maintenance.
- Plug in the power cord using a drip loop to prevent water from traveling along the cord
and coming into contact with the receptacle.
- Do not stare at LED Bulbs.
|
| Please cut off the power source and unplug the electric wire
for safety, if any situations of danger or urgency happened. |
- Under normal use and service, all appliances carry 12 months warranty from the date of purchase on parts and labor against manufacturing defects. Please return the unit if deemed defective to your local dealer for repair or replacement.
- The warranty is limited to this appliance only, Not responsible for consequential loss or damage.
|
|
|